Assign Online Tests (Progress Monitoring)
Before you can assign a "Take Online" test in the Progress Monitoring Measures, make sure you have created groups and added students to them.
For detailed directions on how to add students into groups, please refer to the Help Desk Topic: Grouping Students
Assign a Take Online Test
To assign a "Take Online" test, login into your easyCBM Dashboard and click on the Measures tab.

Next, select the "Progress Monitoring" tab.

Next, you'll select a grade level and locate the measure you wish to administer online.
Once the measure is located, you'll notice on the "Take Online" check box to the right of the "Enter Scores" link.

Click the box, and a drop-down list of your "Student Groups" will appear.
Here you can check the box next to each Group that you would like to assign the "Online Test" to and what type of "Student Feedback" you would like the student(s) to receive after the test is completed.

Once these boxes are checked, the student(s) within the group will be assigned the test and can enter through the student portal to take the assessment online.

Now that you have assigned a group an "Online Test", to confirm that your student(s) were assigned the assessments correctly.
Confirm Student Assignment
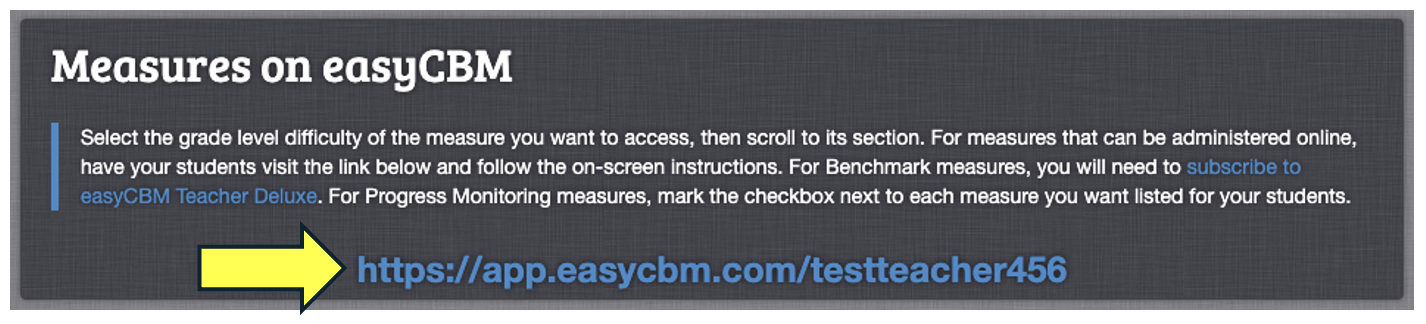
To confirm that the student was assigned the "Online" test, scroll up to the top of the Measures page and click the teacher link (pictured below) in the "Measures on easyCBM" box.
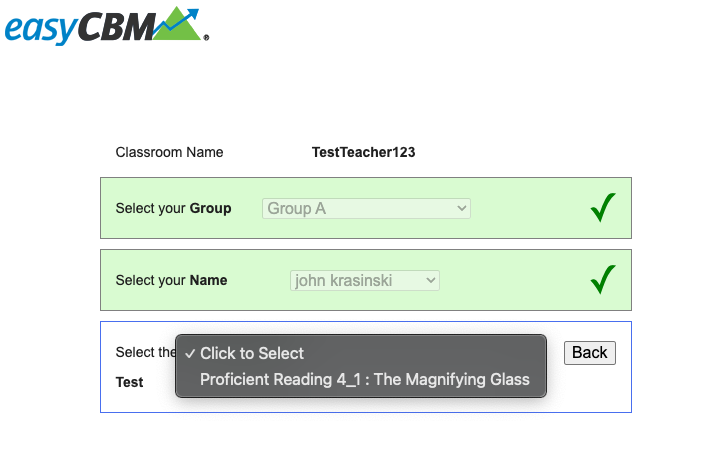
Next, you'll be taken to the student assessment page where all tests are taken.
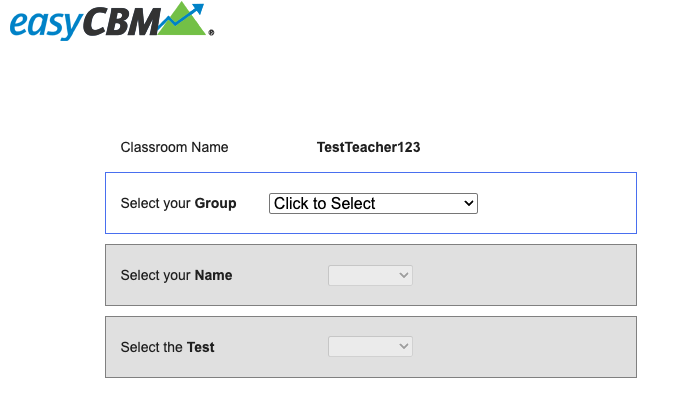
From here, you'll select a "Group", then the "Student's Name" and then the available tests for that student will be shown in the "Select the Test" drop down menu. (example below)
Unassign a Take Online Test
To assign a "Take Online" test, login into your easyCBM Dashboard and click on the Measures tab.
Next, select the "Progress Monitoring" tab.
Scroll down the page until you locate the name of the assessment that has been assigned. To determine which tests have been assigned, look on the right-hand side of the test name to the “Take Online” box. If this box is checked then look to its left at the link, "Show Options".

If you click on this link, a drop-down list of groups will appear. The checkmark next to the group name indicates which groups have been assigned to take this test.

Now uncheck all of the boxes or groups you want removed from testing, by unchecking the box beside the group name(s).

To confirm that the student is no longer assigned an assessment, follow the "Confirm Student Assignment" steps above.